
Posts on Happily Homegrown contain affiliate links. When you make a purchase through an affiliate link, your price will be the same, but Happily Homegrown will receive a small commission. Thank you for your support!
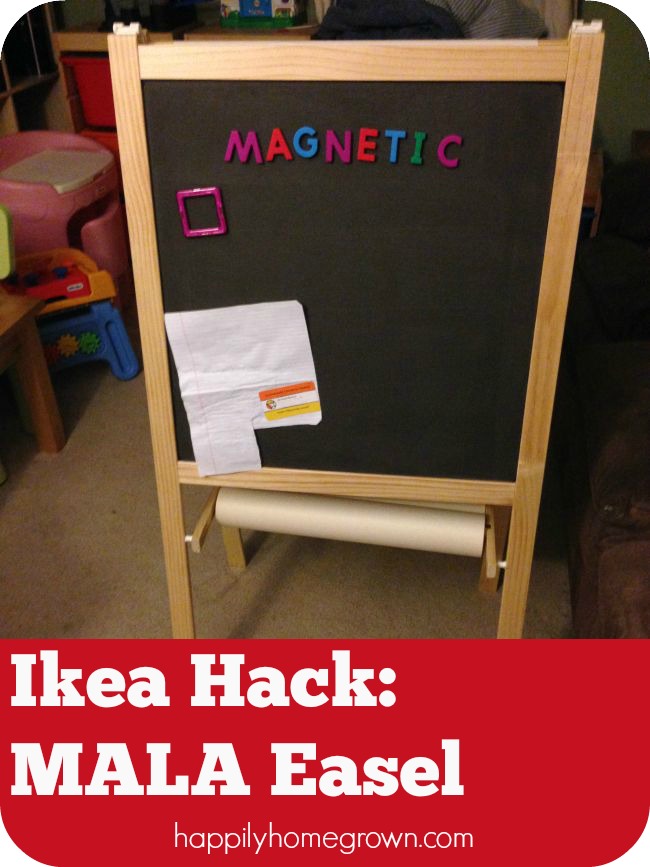 Recently, I wandered the showroom at IKEA and found the MÅLA easel – a basic children’s easel where one side is a wipe-off board, and the other side is a chalkboard – for $14.99! I couldn’t believe it! Brand new, and still cheaper than what I was used to seeing at consignment sales for a wooden framed easel.
**The MÅLA easel is also available through Amazon if you don’t have an IKEA near you.
There was only one catch – I really wanted at least one surface to be magnetic, and that is not available on this easel.
I did a quick online search for magnetic easels, and found that many of them were well over $50! No no, that wouldn’t do. I needed to find a way to make the MÅLA easel have at least 1 magnetic surface, and that’s when it struck me: Rust-Oleum Magnetic Primer!
I had previously purchased a quart of magnetic primer for a different project, and then never used it, so it was already sitting on a shelf in my laundry room. I bought the easel, as well as the chairs I had gone to IKEA for in the first place, loaded the car, and went home happy with the new project I was about to undertake.
IKEA Hack of the MÅLA Easel
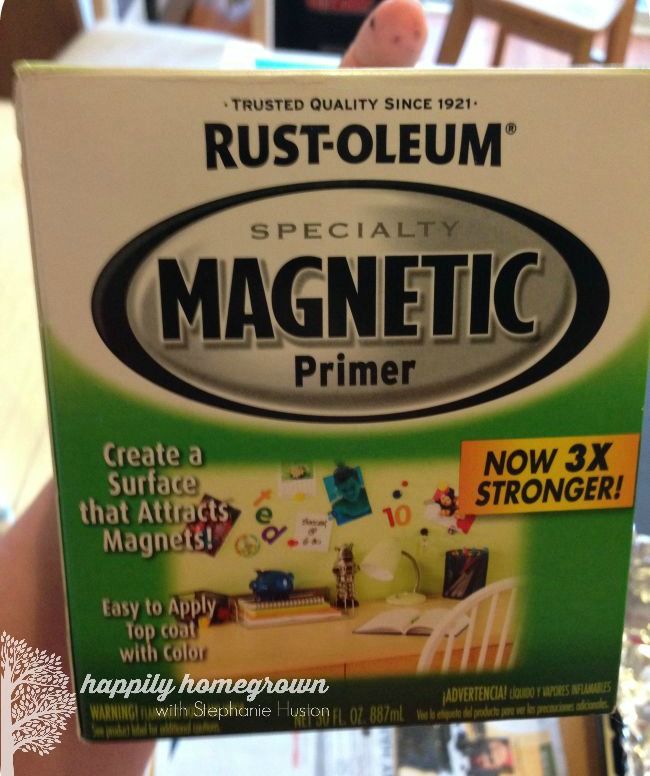
1. Mix the paint. Magnetic Primer has bits of iron in it that makes a heavy sludge in the bottom of the can when it sits on a shelf for too long. You can mix the primer by hand, scraping the bottom often, or you can take it to your local paint shop or hardware store and ask them to give it a shake for you. I opted for the later. Just be aware that shaking the paint only keeps the particles in suspension for a short period of time. You need to go home and use it right away, and continue to stir often.
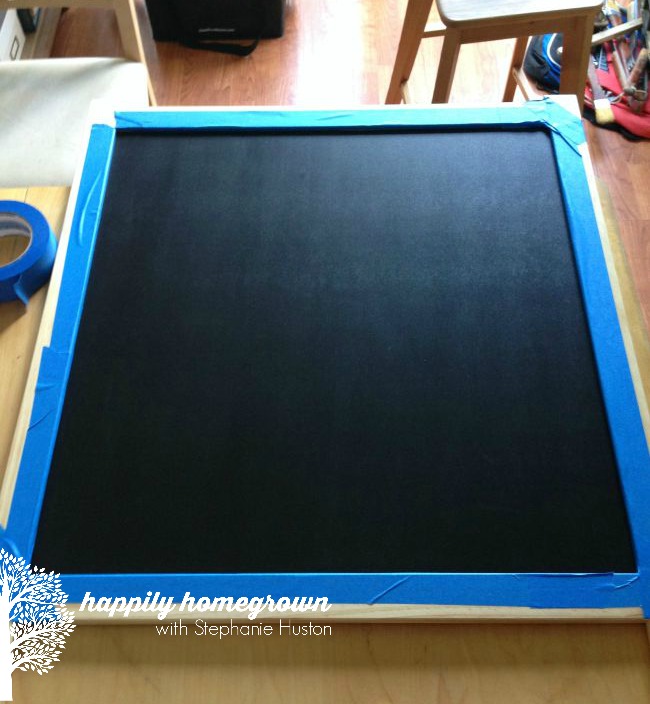
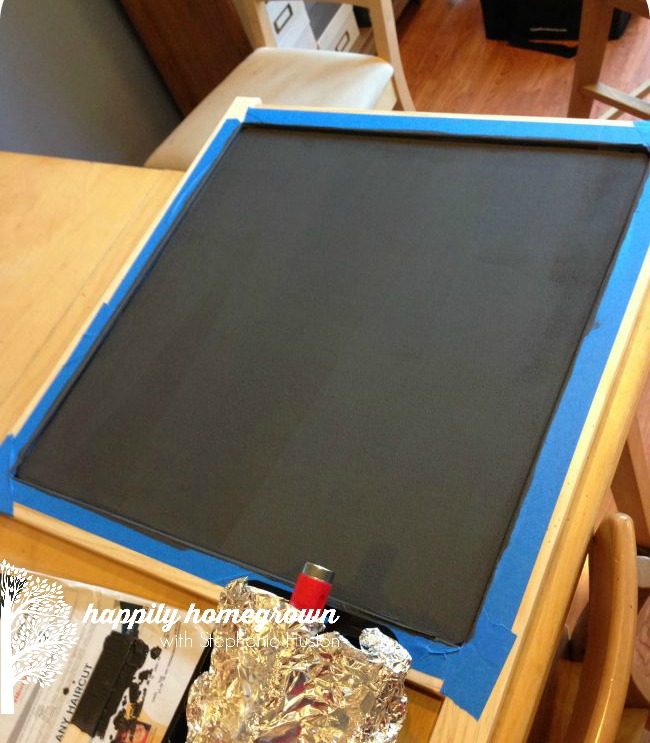
2. Tape the edges of your project with painter’s tape. I am not a neat painter so painter’s tape is always in my paint kit.
3. Using a dense foam roller, apply an even coat of the magnetic primer to your surface.
4. Set a timer for 30 minutes, and then repeat. Rust-Oleum recommends a minimum of 3 coats; I chose to do 5 since I had poured a little too much paint in the tray.
5. After your final coat of primer, remove the painter’s tape, and allow your project to dry for at least 2 hours before putting magnets on the surface. I ultimately want to put a coat of chalkboard paint overtop the magnetic primer, but I don’t have any on hand right now, so that will wait for another day (and a lot more taping and covering of the wood since I prefer the spray paint version of the chalkboard paint for this project). You can put up to 2 coats of a top-coat over your magnetic primer, and still have a magnetic surface.
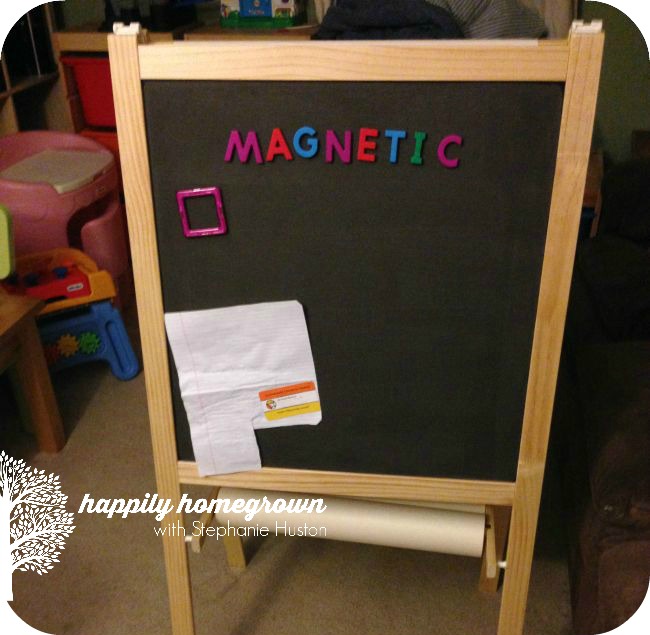
Once the magnetic surface was dry, I assembled the MÅLA easel, added a roll of drawing paper, and we were good to go! My children absolutely love their magnetic easel and they are using it all of the time.

 Day 8: Laundry Room
Very creative and resourceful that you used what you already had in the house. Love this project!
I’ve never even heard of magnetic primer! Oh, my mind is spinning with all the projects I can use it for. Thanks so much for sharing this.
Magnetic primer is a great invention! I have used it for several projects around our home, and I already have a few more ideas for the rest of the can.
Question :so if I choose to, after the coats of primer, I can go over it with chalkboard paint? Would that create both a chalkboard and magnetic surface? I’ve never seen this. Would it matter if I used the colored chalkboard paint? Thanks!
You can absolutely use both the magnetic primer & chalkboard paint. Test your magnetic surface before applying the chalkboard paint to see if you need an extra coat before doing the chalkboard paint. The color of the chalkboard paint won’t matter.
Love this! Which side did you turn into the magnetic board (dry erase or chalk)?
Thx!
The magnetic side is the chalkboard side.
Can kids still use the chalkboard with chalk after applying the magnetic paint?
You would need to add 1-2 coats of chalkboard paint on top of the magnetic paint for the chalkboard to be a chalkboard again.
Can this primer be used on the whiteboard side ? And will it still be a dry erase surface after that?
It can be used there, but it will no longer be dry erase after.
How did you connect the paper roll to the base? Did you use the IKEA paper roll holder? I’m going to do this for my daughters birthday. I was going to just get the easel but being able to add magnetic letters and numbers makes it even better!
The easel comes with a dowel that the paper roll slides onto. The IKEA paper roll holder is better for table tops. Have fun with your project, and I hope your daughter loves it!
One tip – Pick up an extra roll of paper while you are at IKEA. Theirs is significantly cheaper than what you would get at the local craft store.
Hi,
Which magnetic paint and chalkboard paint did you use? The rust oleum one you have listed has very poor reviews. Does it work great?
Thanks,
Rachna
I used the rustoleum magnetic paint. It isn’t strong enough to hang heavy items, but it works for the magnetic letters and small items.
Is the magnetic primer clear?
The magnetic primer only comes in a dark base. I didn’t add a top coat so you can see the color of it in the photos. You can paint a coat of whatever color you want on top.
Hello! Do you think this would be strong enough to hold magnet tiles/stick paper to the dry erase side if I primed the back instead? Thanks
You can use the magnetic primer on either side of the board, or any surface really, with similar results. You do need to build up several layers of primer for the tiles/letters to stick. It is not as strong of a bond as using a metal surface, but it does the trick.