Posts on Happily Homegrown contain affiliate links. When you make a purchase through an affiliate link, your price will be the same, but Happily Homegrown will receive a small commission. Thank you for your support!
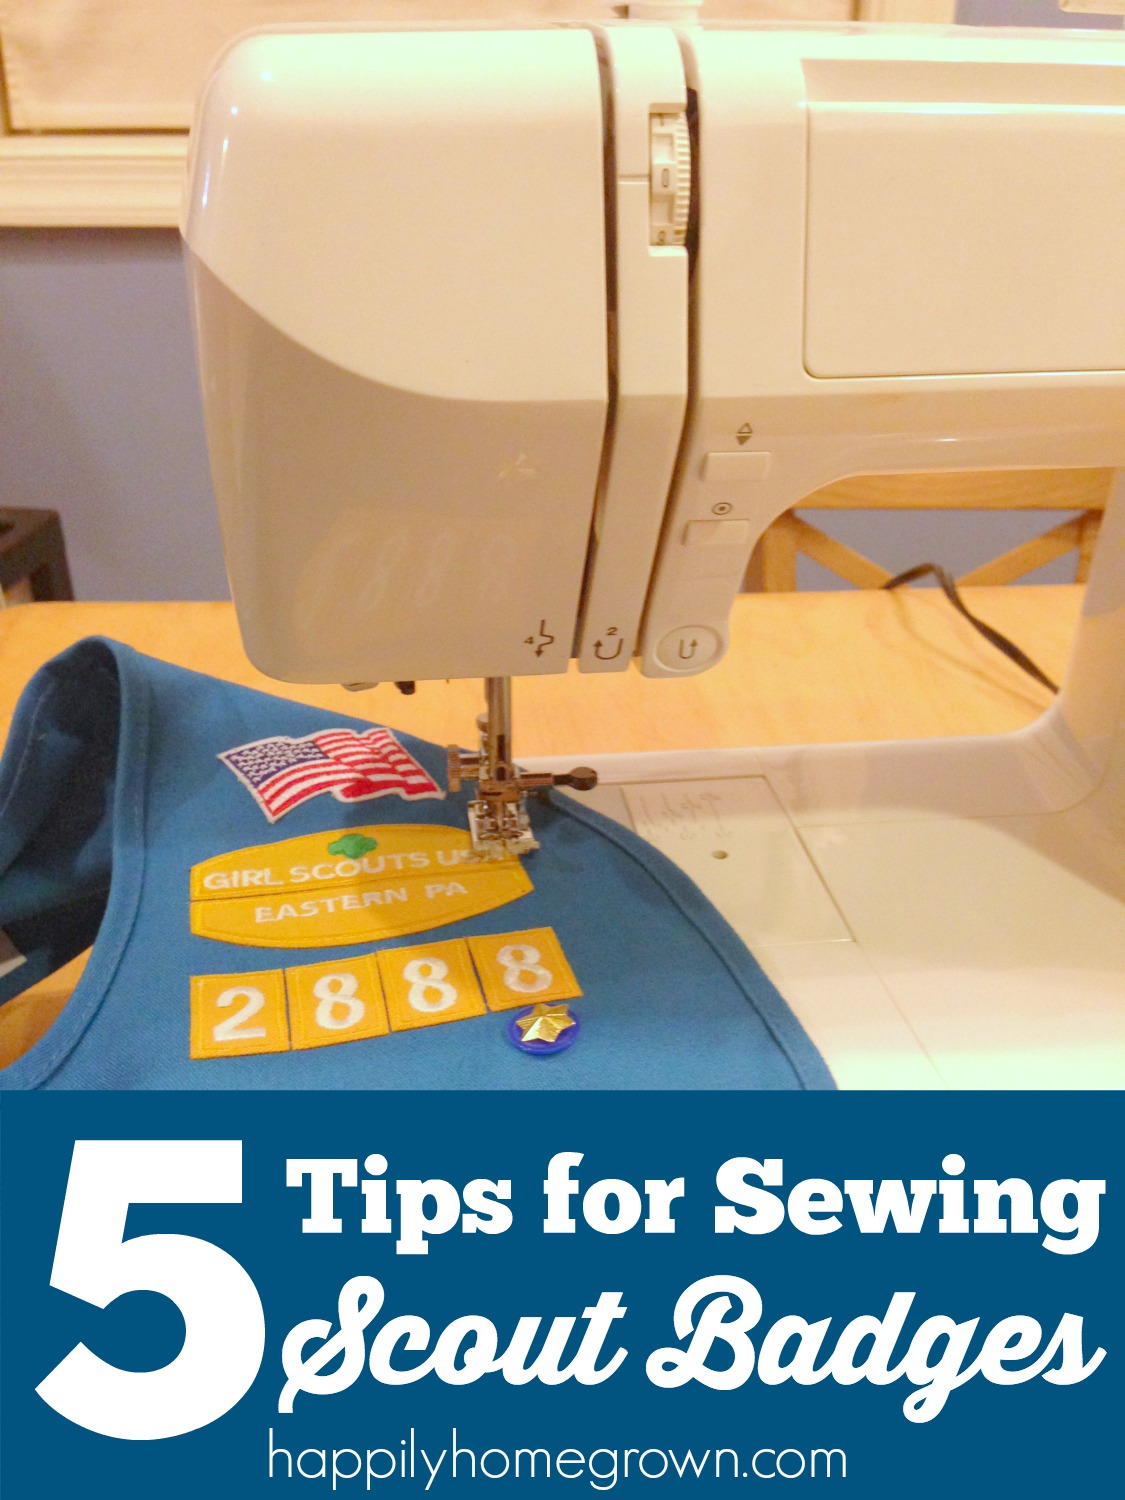
These days, most Girl Scout badges, fun patches, and insignia are made to be ironed on, but let’s be honest, the iron on adhesive doesn’t hold. As a Daisy leader, I see the girls with their little fingers playing and pulling at their patches, and before you know it, troop numbers are missing or petals have gone missing. The girls are cute as can be, but their uniforms are a hot mess!
This year, we have been doing things a bit differently, and now we are sewing scout badges, fun patches, and insignia even if they say they are “iron on”. Since doing this, we haven’t had any casualties, and the girls are much happier with the look of their uniforms.
For the record, I am not an expert seamstress by any stretch of the imagination. I can sew a straight line on my sewing machine, but I can’t do all of the fancy stitches. If I can do this, anyone with a sewing machine can do this and have their Girl Scout or Boy Scout uniforms in tip top shape in no time!
5 Tips for Sewing Scout Badges
- Place the badges where they belong. If they are iron on badges, iron them on and then allow them to cool entirely so the iron on adhesive doesn’t gum up your sewing machine needle. If it is not an iron on badge, use a small piece of painter’s tape to adhere the badge where you want it to go. This is much faster than pinning and will result in fewer cuss words and poked fingers.
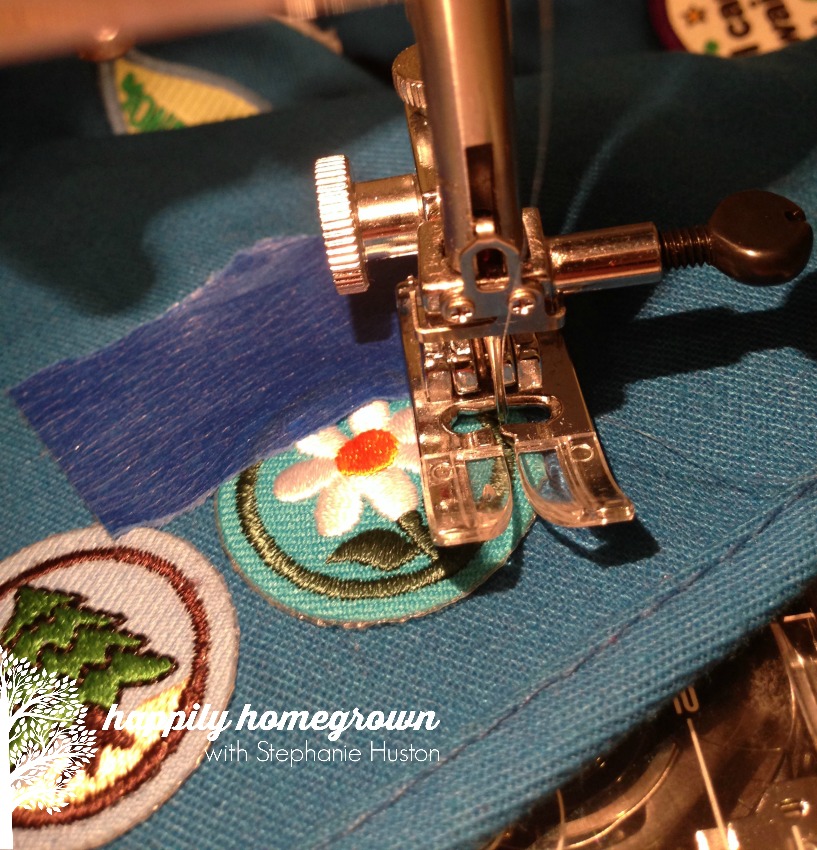
- Set up your sewing machine with invisible thread. Invisible thread is a monofilament thread that is virtually invisible when used. You only use this as your stitching thread though, not your bobbin. To thread your needle, draw on the edge of the thread with a black Sharpie so that you can see it to work with it. You will also want to adjust your sewing machine’s tension to a 0 or 1. Tension that is too high will result in a broken thread.
- Select your bobbin color to match the item you are sewing. I use Coats & Clark Dual Duty XP General Purpose Thread from Joann Fabrics. This is my go to brand for all of my sewing projects. If you can’t find the exact color you need, then go with a neutral and you will still be good to go, but Joann’s makes it easy for you and all of their threads are also available online.
Daisy Uniform – Color 5160dd Radiant Blue
Brownie Uniform – Color 8880 Cherry Mahogany
Junior Uniform – Color 6550 Kerry Green
Cadette/Senior/Ambassador Uniforms – Color 8010 Natural or Color 8050 Buff
Cub Scout Uniforms – Color 4880 Freedom Blue
Boy Scout Uniforms – Color 8010 Natural or Color 8050 Buff
- Line up your needle with the edge of the badge you are going to sew on, and “knot” your thread. On my sewing machine, there is a button that I press that will lock the stitch for me, but if you don’t have that, you may have to stitch forward a few, then reverse stitch a few to “knot” your thread. You will need to do this when you start and stop each badge.
- Sew your badges on staying close to the border of the badge. Take your time, this is not a race, besides, going too fast could result in a broken invisible thread. Remember to remove your tape before stitching through it.
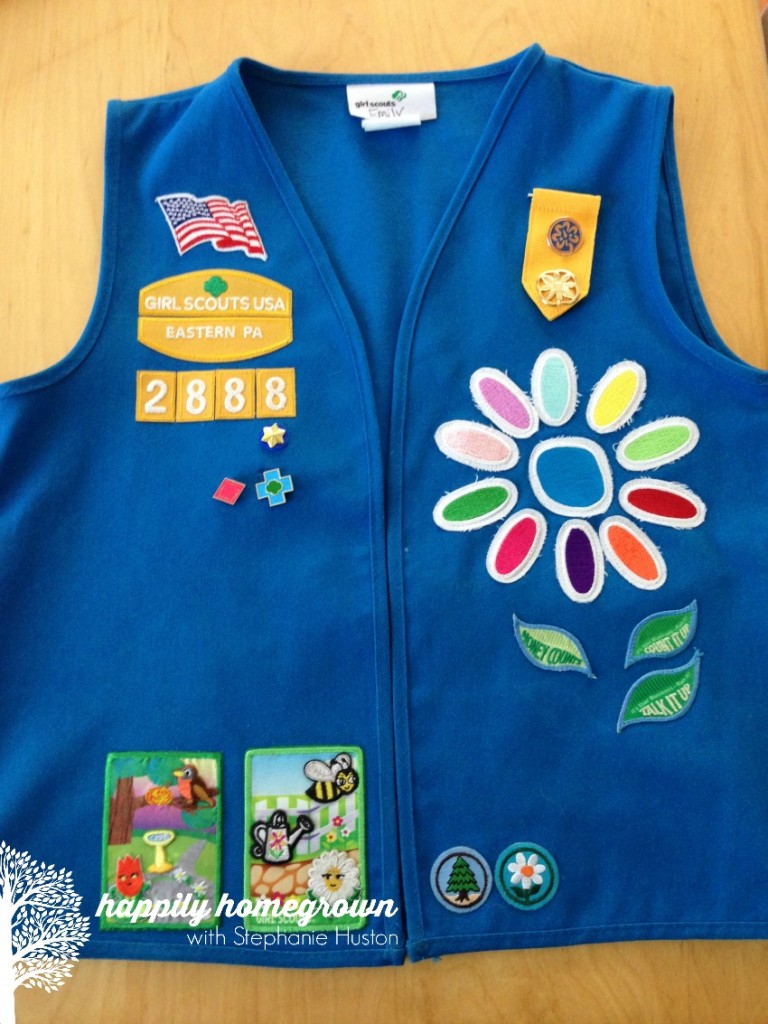
Please note: the image above has the two small round badges on the front of the uniform. These are council own badges and we chose to put them on the front. Some troop troops/councils prefer council own badges be placed on the back of the uniform.
When you are finished, trim your stray threads and that’s it! Your scout’s uniform is now ready to wear, or get washed, without the fear of losing patches.



 Lemon Meringue Pie

I so need to figure out my sewing machine. It’s the only thing stopping me from sewing on all the patches for three kids. I’m inspired now, so will try again today!
Good luck!
I think ironing the patch on and waiting for it to cool before sewing is a great tip. This will really help when I’m trying to sew the badges on.
I made the mistake of not letting it cool the one night when I was trying to sew several uniforms. It took longer to clean the gluey adhesive off of my needle than it would have to wait the extra few minutes.
I know I will need this post someday! I can’t sew – my husband actually does the sewing in our house!
Ok you just motivated me to dust off my sewing machine. Great tutorial!
Thank you! Happy sewing!
I knew this post was for me when you brought up using painters tape over pinning in place! Lol! My mom did NOT sew…fabric glue was her go to, haha. So this was a helpful but very approachable for a complete newb 😉
I’m so glad! I have seen scout parents using a hot glue gun or stapler to attach the badges/patches, and I was in shock! This is actually super easy, hide a multitude of mistakes and flubs (invisible thread is awesome), and is perfect for anyone who is new to sewing or has been doing it forever!
Thanks for sharing this on Dream Create and Inspire, love the girl scout badges, brings memories, if you have a few stop by and visit, love to hear from your
Maria
Any tips on the thick patches???
I have done the exact same thing with the thick patches – even with the thick Boy Scout merit badges, and it has worked out beautifully. If using the invisible thread, just keep your tension at a 0/1 and go slowly with a sharp needle. A dull needle won’t pierce through the thick badges as nicely, and you could break your thread, or worse break your needle (which is a pain in the rear to deal with).
Great tutorial. I was wondering if you could give me any info on the 2 little round badges on the bottom edge of the uniform, are they Council badges? I haven’t seen them before.
A fellow Daisy Leader from NC
Hi Tricia,
Yes they are council own badges from Girl Scouts of Maine, and since they are an earned award, they can go on the front of the scout’s uniform. We found that putting them along the bottom hem under the daisy worked best, and left plenty of room for the 3 journey awards to go on the other side. You can find the information about the Daisy award program here –> http://goo.gl/p0IrOo
If a troop did these in another state, how would they purchase them?
Are you referring to purchasing council own badges? You can order them directly from the council. Many are in the online Girl Scout shop from GSUSA. There are also Facebook groups where you can track down badges that you can’t find online.
Oh, one tip of my own is I actually sew the insignia tab in place also. One less thing to lose.
We have been really lucky that they haven’t fallen off. I do write the girl’s name on the back of them though just in case.
You said the Daisy color in Coats and Clark is 510. I looked online and it looks like all of the blue choices are 4 numbers. Am I just not seeing it? Or is it a different number?
It appears Coats & Clark changes their color # on the different size spools of thread. #510 is called Radiant Blue, and if using the link above, #5160dd is also Radiant Blue. I will update the post. Thank you for pointing this out!
I use a disappearing quilters ink pen, and sew almost all of the badges on zigzag, that way I do not mess up the badge or patch.
I’ve been doing this for the 23 years as a leader, the only hard part is finding thread that matches all the borders.
That’s awesome! I don’t have the patience to match all of the border colors (then again its much easier now than it used to be).
Another tip for your Daisy uniforms. To avoid the “fraying” edges of the Daisy center and petals, use a lighter around the edges much like do would do for a ribbon edge. If you’ve already sewn them on, no problem. Quickly pass the flame over them, those little frayed bits melt/seal up very quickly and make the uniform look crisp!
What a great idea! Thank you for the tip.
I sew scout patches on at work. Thanks for the colors! Here’s a hint that has been incredibly helpful to me: basting spray. You spray it on the back of the patch, press it to the uniform, and the patch stays put while you sew it. It washes out in one wash and doesn’t gum up the machine at all. It doesn’t take much. I buy it at Joann.com and then pick it up in the store. Thanks for your post!
I have never used basting spray before. I’ll have to check it out! Thanks for the tip!
By “press” I mean with your hand, not an iron.
Thank you for clarification.
Thank you! I just bought clear thread for my machine and was wondering how well it would work in my machine, because I’ve heard some horror stories. Now I know to adjust the tension.
I’ve been sewing my girl’s badges on her vest for some years now, and stopped ironing them on first because she earns so many that I sometimes have to move them around to make space for more, especially when it comes to fun patches on the back. I find it easier to remove stitches and relocate the patches if they’re not ironed on first.
Also, to keep the troop numbers and council ID patches nice and straight, I learned it’s best to sew them together first, before attaching them to the vest. This also works for Journey badges that piece together.
Thank you for the tip on sewing the journey patches together first. I can see that being so helpful, especially with those Daisy awards where they layer on top of each other.
What are the two round patches on the bottom left of the vest for? They are cute! I haven’t seen them yet, but I’m a new leader. Thanks!
They are the council own badges from Girl Scouts of Maine. You can get the requirements from their council’s website.
THANK YOU! I was afraid sewing the patches on would kill my machine because the patches / badges look so thick! Yes, I can sew, but I’ve never sewn anything this thick. So we tried fabric glue and when that didn’t work, we tried another recommended brand. That was a no-go also! That was after ironing them on, which literally lasted one meeting! I refuse to do them by hand (Can you say boring?)! After reading your post, I am fully prepared to use my machine. Maybe I’ll say a little blessing over it first. LOL
I posted a link to this page on our Girl Scout FB page so others can also get inspired.
Thank you so much! Wish me luck!! 🙂
Anne Glasser 🙂
Good luck with your sewing projects Anne! I have sewn more than 100 uniforms this way since the post first went live, and I’ve yet to kill my machine; only break my invisible thread when I forgot to set my tension at zero. You can do this!
When you did the daisy petals did you still use the blue for your bobbin? I had a fun patch where the blue showed through a tiny bit so wasn’t sure if I should use white instead for them? I literally just learned how to use a sewing machine so I can do badges!
I did use the blue for the bobbin even on the Daisy petals. Once or twice the tension was a little bit off on my machine, and the blue thread came up, but just barely and it wasn’t all that noticeable. If you are concerned about it showing, you can definitely make the bobbin the same as the badge color. This works really well with Daisy petals, but not so much once they are earning badges that have a wider variety of colors for the backgrounds.
I think the Junior uniform color has changed since this post. The green mentioned is far too kelly green for tje now somewhat aqua material color. Any new thread color suggestions?
I am currently sewing a new batch of Junior vests, and they are all this shade of green, so it’s unfortunate that some are off color. Since the colored thread is only on the underside of the vest, it doesn’t really matter what color you use for your bobbin, the invisible thread is on the side that you would easily see. If you want to find a thread that matches the vests you have, check out the thread selection at your local Joann Fabric or Walmart stores while bringing the vest with you to compare.
Found this really helpful as I have leather needles for sewing machine and have various patches to go on a leather waistcoat will share with the wife. Thank you
Any insight as to what color the new leader vests are?
The new leader vest is navy, so I just use the invisible thread on the top and navy on the bobbin.